When we decided to have J’s birthday party at Flight, I was a little concerned about how the party would flow. I’m used to at-home parties, and the typical Flight party is one hour of jumping followed by 45 minutes in a party room. We were going to have snacks and cake, but I was afraid that having them in a small-ish space for 45 minutes would make them feel like caged animals.
I was wrong: it would have been fine. But meanwhile, because I was worried about it, I thought a little craft might be a good idea.
And then I was exceptionally foolish, because I asked the birthday girl what craft she’d like to do. And then, when she said, “What about paracord bracelets?” I said okay.
That was too ambitious. But it actually went pretty well, anyway.
J had never made a paracord bracelet before, but M had frequently made them with help from her soccer coach, Coach K. So I figured that I could prepare for the party by asking Coach K which directions she followed, and then M and her friends could be my helpers. Except that it turns out that Coach K didn’t really follow any particular directions, or at least, none that could be located easily via Google or Youtube. Instead, every set of directions I found seemed more complicated than Coach K’s method, using a bunch more paracord, or starting with fusing two different-colored paracords together. Occasionally I’d find an easy-looking step-by-step, but then I’d ask M to look at it with me, and M would declare it the wrong, wrong, wrong way to do it. Then when I asked M to teach me the right way, she got stressed out. It began to escalate into Drama.
This went on for about a week. What was supremely frustrating about the whole endeavor was that I’d actually been in a room full of 7th graders who were making paracord bracelets about two days before J’s birthday craft request. Coach K was leading a group through the craft while I ignored them, choosing to drink a glass of wine and chat with other parents instead.
Eventually, it was J’s birthday party eve and full-on desperation set it. I brought a bag full of supplies to a soccer game so that Coach K could give me my own private in-person tutorial in the parking lot by the soccer field. When I left you could tell that Coach K wasn’t feeling too optimistic about the whole situation, but I rushed home to make a bracelet before I forgot what she’d taught me, and I texted her a triumphant photo of a bracelet an hour or so later.
So, now that I’ve learned, I’m documenting Coach K’s/Katie’s simplified method of making paracord bracelets.
1. Gather supplies. To make one paracord bracelet for a small person, you’ll need:
- 7 or 8 feet of paracord (It comes in different thicknesses; I used 550 paracord that I bought at Michael’s)
- 1 paracord buckle (15 mm went with the 550 paracord at Michael’s)
- sharp scissors
- a little bit of tape
- a clipboard or binder clip
- a lighter
2. Choose what color paracord you’d like to use. You’ll need two pieces of paracord, which can be different colors. Three and a half feet long is probably enough for a kid’s wrist. If you want to be extra cautious or make a bigger one, make the pieces longer. When I did this I was pretty hyper-paranoid. My pieces of paracord were each about 5 feet long, so I ended up wasting quite a bit.
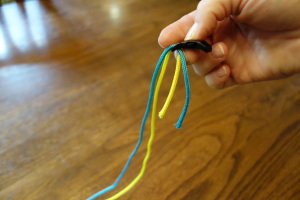
3. Line the two cords up parallel to each other, and then string the one end of the pair of cords through one half of the paracord buckle. It doesn’t actually matter which half of the paracord buckle (meaning, the “male” or the “female” half–in the picture below the halves are joined together) you string it through, because where the buckle attaches to the cord, both halves are basically the same. You do want to notice the curve of your paracord buckle. Some of them are straight, but if you happen to have a curved buckle, like I do in these pictures, then you’ll want to ensure that the curve follows the curve of the wrist and plan what will be the top/exterior vs. bottom/interior side of the bracelet. So, you’ll string the ends through the top of the buckle and end up with a bit of spare string–maybe an inch or so, that hangs on the bottom/interior part of your future bracelet.
4. Tape this so that the four pieces are together and the buckle stays on. Then, thread the other ends of the paracord through the other side of the buckle.
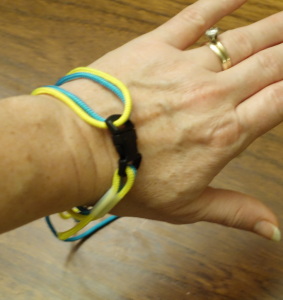
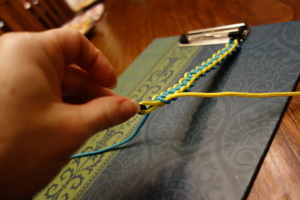
5. Now you’ve got a loop of paracord that you can make larger or smaller, plus two long tails of paracord. At this point, you can carefully open the buckle and put your hand in, then get a sense of how long your bracelet will need to be. That depends on wrist size and how tight you’d like the bracelet to fit. Here I am trying it on–this is a bit too loose, actually:
A good method is to make a snug fit, then add an inch or two of leeway. You’ll be able to adjust again later, if you’d like.
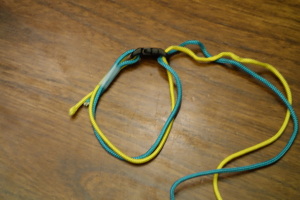
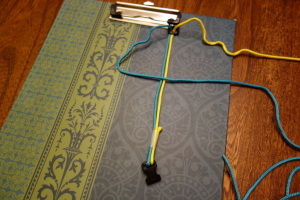
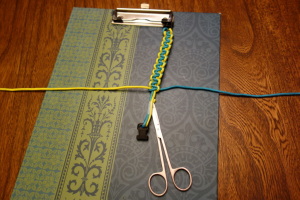
6. Once you’ve determined how long you want your bracelet to be, you’ll want to pinch that cord at the buckle and try to keep it in the same place as you remove the bracelet. Then you’ll have a loop with a long tail, and you’re almost ready to get started. If you look at the bracelet-in-progress below, I’m about to unclip the buckle, and I’ll start from the untaped end, on the right below. I’ll shift it so that part is on top, and I’ll be working with the two loose tails of paracord (on the right in the picture below), looping them around the base that forms a circlet here, which will become the core of the finished bracelet. Gradually I’ll work my way down to the bottom, where it’s taped.
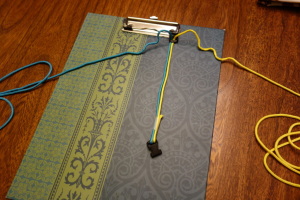
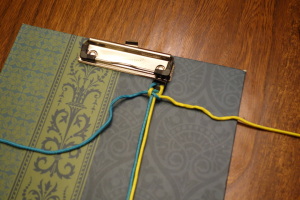
7. Coach K uses a clipboard to keep the bracelet in place and I think that that works best. So here’s where I’m about to get started, using the clipboard method:
8. You’ll start with the color on your left (blue here). Now, if you care about what color shows up on the edges vs. in the middle of your bracelet, the color you start with will form the middle, and the second color you use will show up on the edges. So my bracelet will have a blue middle and yellow along the outside. You still have time to switch this up by rearranging it, now, if you want to do so.
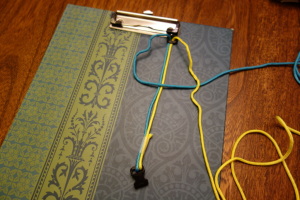
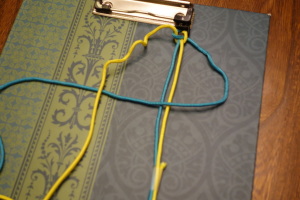
9. Take the color to your left (from now on I’m going to use blue and yellow because it’s easier to follow, I think) and cross the blue over the two center “core” colors to look like the number 4. Like, so:
10. Now we have 3 of our 4 strings involved, and you might be wondering what we’re doing with the yellow. That yellow tail is going to hang down over the blue tail that we just brought to the right:
So the pattern is Over, Over, Under. As in, you took the blue, brought it Over the two strings in the middle, then Under the yellow one. This is going to be a mantra for you: Over, Over, Under.
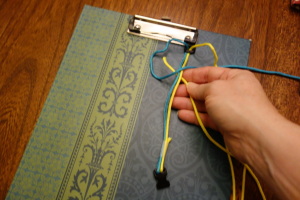
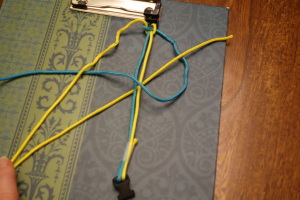
11. But meanwhile, yellow still hasn’t done much. You’re going to take one hand and pinch that little spot in the middle of the original 4 where the blue crossed over. Grab all three of those cords simultaneously with one hand and then, with the other, take the end of the yellow and feed it up and through the loop that’s the enclosed part of your original 4. That’s what I did for this picture, except then I needed to use my left hand to hold the camera after I’d positioned the cord just so. Yes, I took the picture left-handed! I’m feeling super-talented.
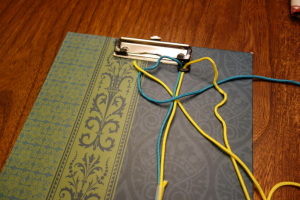
Here’s the same positioning, just with my hand out of the way:
12. Then you pull the two ends. It won’t look like anything yet. The first time or two, you’ll need to be a bit gentle to keep the buckle in place. After that, you can choose to pull tightly or loosely, but be as consistent as you can so that the bracelet looks uniform.
13. Phew, are you exhausted already? Don’t worry: after the first couple of times, it will be quick and easy. The colors have switched sides, and since we always start with the same color, blue, you’re starting from the right this time. But just do the same thing in reverse. First, a 4, although it’s a backwards 4 this time, and then remember to go Over, Over, Under, although this time it’s starting from the right to left:
14. Then take the yellow and feed it underneath right at the point of intersection (there’s extra yellow where my hand is–it’s all a long string):
15. And pull again. It doesn’t look like much, yet:
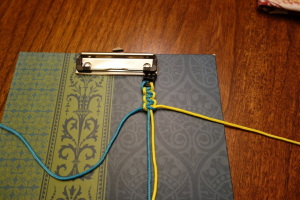
But have faith and keep plugging away, repeating Steps 9-15 a few times. Hooray, it’s starting to look like a bracelet!
16. Continue until you’re approaching that section with the tape. The tape kept you from accidentally knocking the buckle off, and now you’re about to loop right over it. You can choose to leave the tape on, I suppose, but I like to cut it off.
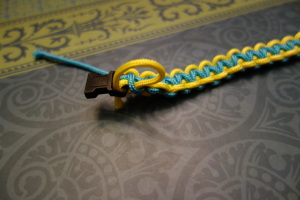
Whether you get rid of the tape or not, you’ll want to continue to treat the four strands of paracord as a single unit that will be the core of your bracelet. This is also an opportunity to make any last-minute sizing adjustments. You’re almost done with the bracelet, and you can shorten or lengthen that spare portion to adjust the bracelet’s size if you’d like. You can also trim off some of the extra cord here, but leave about an inch of excess that will be part of the core that you’re looping around. It really doesn’t look much thicker, even with the extra strands in there, and incorporating the ends will attach them firmly, so it looks like this:
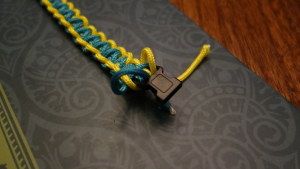
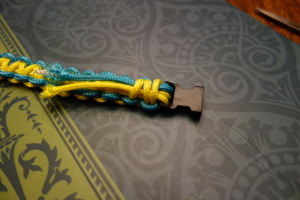
17. Keep looping until you get right up to the buckle. Now, at some point, you’ll want to trim the excess paracord. I don’t like to do it yet, but I thought it looked clearer to get rid of it for these pictures. So you might want to go ahead a stay long for a bit yet. You’ll stuff the two ends of the paracord into the buckle where the rest of the bracelet is attached, like so:
Notice, you’ll want to insert the extra from the top/exterior so that the ends will be on the bottom/interior side of the bracelet. Ah, that’s one, and here’s two end stuffed (the view’s from the top):
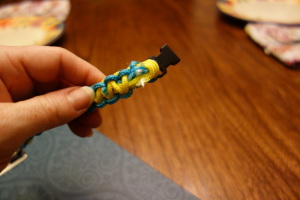
18. Turn the bracelet over and loosen the cord a bit so that you can tuck the ends into some of the loops that you’ve already made. This can be a bit tricky, but you’re almost done.
19. If you haven’t already trimmed the excess cord, now’s the time to do it. To keep this closed permanently, you’re going to use heat to fuse it together. If you look closely, you’ll see that the pretty colors surround a nylon core that melts and sticks together easily. See?
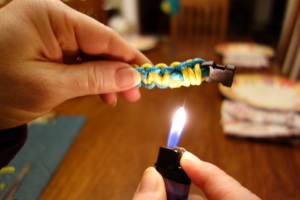
20. If you’d like, you can strip away a bit of that color stuff to make it stick together better, but it didn’t seem really necessary when I did it. Just hold the spot over a flame for 10 or 20 seconds:
Yep, both hands! J took that photo for me. While it’s still melty and malleable, you can smoosh the bracelet against something quickly (if you have big scissors, the blades of the scissors work) to encourage the bits to stick together. Let it cool, and you’re done!
Now, what if you are crazypants and want to help a bunch of kids do this at a party, for example? Well, I’m adding the modifications I used to make this work for a group, and where in the process I’d do them.
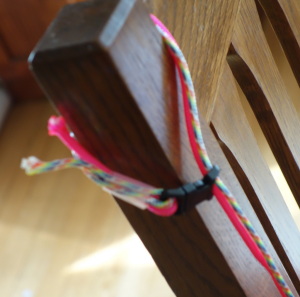
Steps 4-6: For J’s party, I pre-cut and paired a bunch of color combinations, added the buckle and the tape, and hang them off of our dining room chairs. When the girls arrived at the party, I asked them to choose a color combination, and then we checked the fit on their wrists.
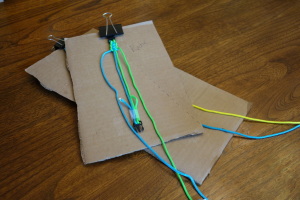
Step 7. Once we’d gotten their bracelet choice, each child was released into the wild. You can attach the bracelet to a clipboard or a piece of sturdy cardboard with a binder clip. Label with a name, and you’re all set.
Steps 9-15. I think that starting off the bracelet is the toughest part, so I did Steps 9-15 for each kid’s bracelet while they were jumping around and Cute W was taking pictures. Should I have been soaking up the fun and reveling in this, my child’s only tenth birthday party ever? Probably. Whatever. It’s too late now. But, this is do-able: that’s the point. If you have a couple of competent parents to help you or if you’re doing a sleepover and have a bit more time, that would allow you to relax more than I did. The kids still do plenty of the bracelet themselves.
When it’s craft time, you can hand out the boards and give the kids a quick tutorial on how to get started, then walk around and help where it’s needed. It’s pretty easy to spot if they’re doing something wrong, because the pattern won’t look corrrect.
Step 16. I should have paid more attention to how quickly some kids were going so that I could jump in before they started weaving over the tape. They really didn’t care, but it’s a tip that I bequeath to you, gentle reader.
Step 17. By this point, most kids aren’t particularly interested in “finishing off” the bracelet, and they’re happy to have you do the last part for them. Luckily, since they’re all progressing at their own pace, you don’t have everyone asking you for help at once. At our party, we definitely needed a bit more time, especially since we’d packed the bracelet-making in with snacking and birthday cake singing-and-eating in 45 minutes. But the girls ran off and played while Cute W and I fussed over bracelets with the lighter, and it didn’t take too much time.
In my opinion, the bracelet can really function as your goody bag/gift, too, because the finished product is nicer than most of that party favor stuff.


jon
Paracord is a cord made of nylon that was first used for US military parachutes. Now days it is used by both the military and civilians as a multipurpose utility tool, and can be purchased in a wide range of colors and patterns..